...
If you have placed access restrictions by ip address, please contact Celayix Support for the ip address specific to your instance.
B. Create an entry in your IdP for
...
Celayix
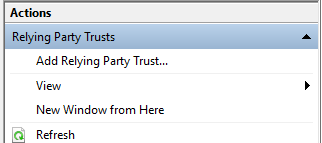
- Go to your ADFS configuration window, select "Add Relying Party Trust..." in the Actions panel
- On the first page of the Wizard, ensure
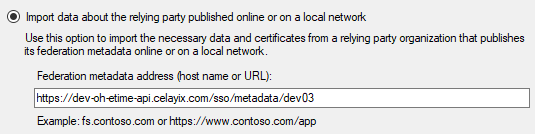
Claims awareis selected and click Start - Paste the Celayix metadata URL from step 4 of Part 1 above into the
Federation metadata addressfield and click next - Click Next
- Give your entity a suitable Display Name, like "Celayix Workforce Management" and click Next
- Choose an appropriate Access Control Policy for your use case
- If all Active Directory users in your domain have accounts in Celayix platform, you can use the
Permit everyonerule - For more control over who will have access to the Celayix platform portal, use
Permit specific groupand select a group that only contains users with accounts in all Celayix applications - Schedule Xpress, Time Xpress, Team Xpress.
- If all Active Directory users in your domain have accounts in Celayix platform, you can use the
- Once an Access Control Policy has been chosen, click Next
- Review the information in the Ready to Add Trust page and click Next
- On the finish page, click Close
C. Configure Claim Issuance Policy rules for Celayix
...
- Right click the Relying Party Trust that was created above and select Edit Claim Issuance Policy...

- Click Add Rule...
- Select Transform an Incoming Claim from the dropdown and click Next
- Give your claim rule a name
- From the Incoming claim type dropdown select
UPN, from the Outgoing claim type dropdown selectName ID - The Outgoing name ID format dropdown should become enabled, select
Emailfrom this dropdown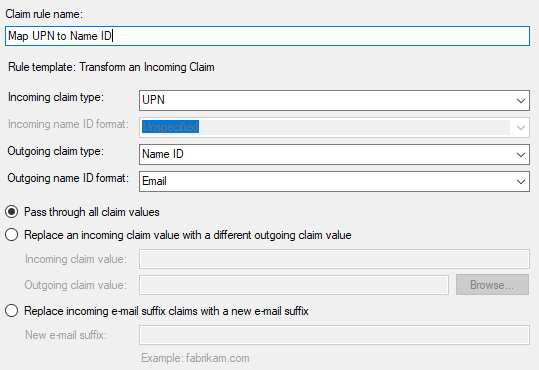
- Click Finish
- Click Apply to save your Claim Issuance Policy rules
...
- Log in to OneLogin as an administrator
- Click
Administrationin the title bar - Click
Appsin the title bar - Select the app you configured below
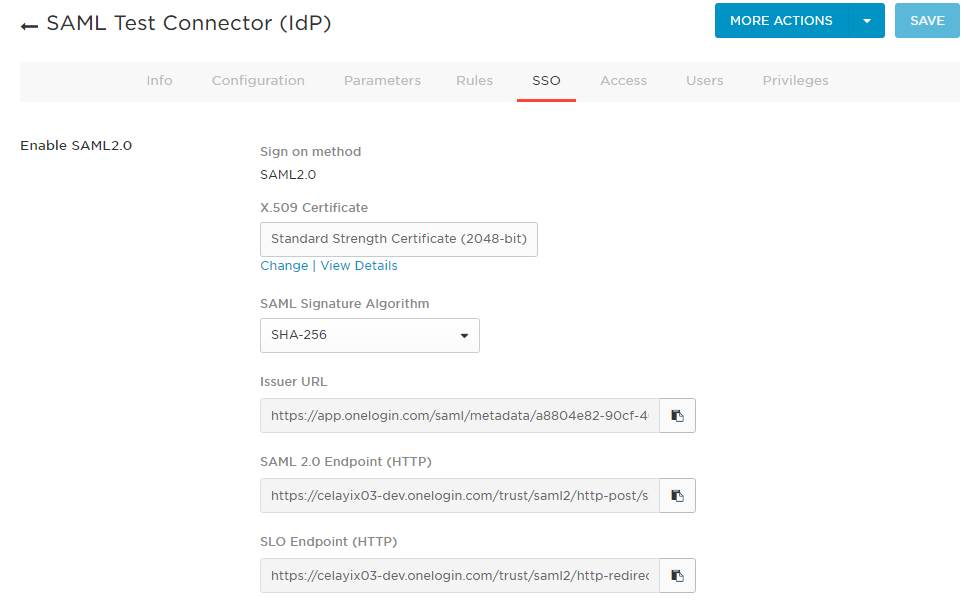
- Select the
SSOtab for this app - The metadata for your app is in the
Issuer URLfield, copy it to paste into Schedule Xpress
B. Create an entry in your IdP for
...
Celayix
- Log in to OneLogin as an administrator
- Click
Administrationin the title bar - Click
Appsin the title bar - Click the
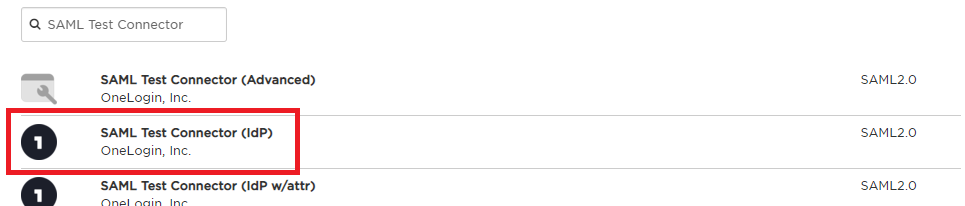
ADD APPbutton just below the title bar - In the search bar type SAML Test Connector
- Click the option
SAML Test Connector (IdP) - In the
Display Namefield give your entry a descriptive name - Click
Savein the top right - If you haven't already done so, you can now perform step A. Locating your IdP federation metadata


...
A. Locating your IdP federation meta data
B. Create an entry in your IdP for
...